How to Save your Excel files to OneDrive
Save your Excel files to your OneDrive location and access your files from any computer or share it with other people.
1. Open a workbook.
2. On the File tab, click Save As.
3. Click OneDrive, Sign In.
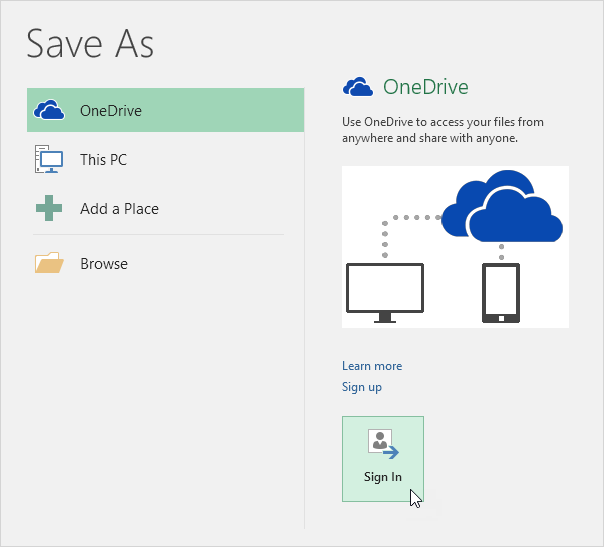
Note: if you don’t have a Microsoft account, click on Sign up to create an account. If you’re using Outlook or Xbox live, you already have a Microsoft account.
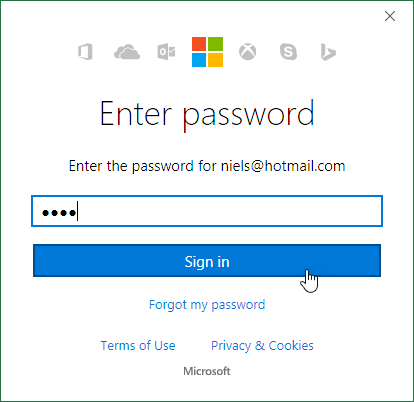
4. Type your email address and click Next.
5. Enter your password and click Sign in.
6. Select a folder.
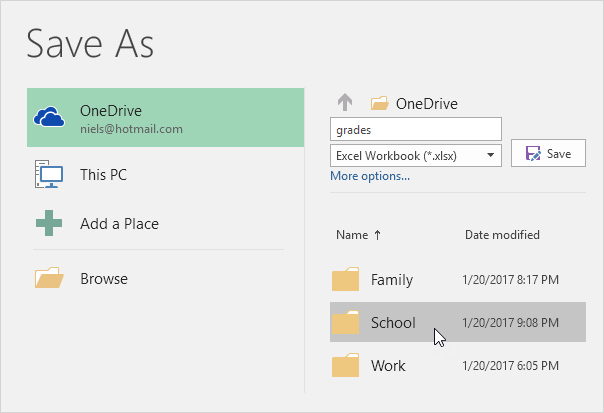
7. Click Save.
You can now edit this Excel file with Excel Online from anywhere without having Excel installed on your computer. To share this Excel file with other people, execute the following steps.
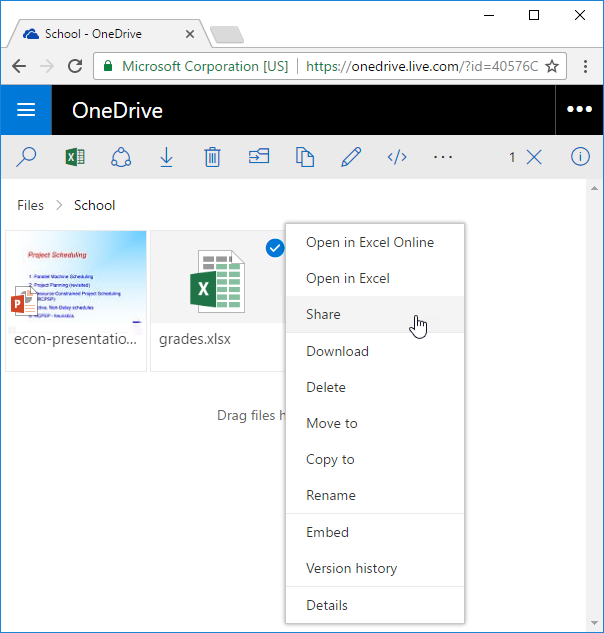
8. Go to onedrive.live.com and sign in with your Microsoft account.
9. Click the folder selected at step 6.
10. Right click the Excel file and click Share.
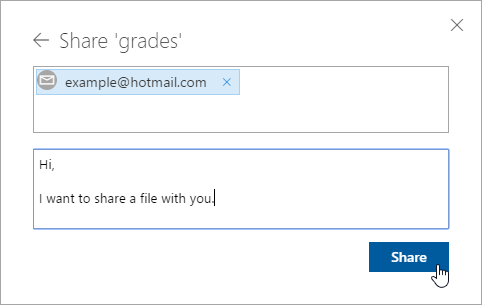
11. Click Email.
12. Enter an e-mail address and click Share.
The recipient receives a link and can edit the Excel file. You can now use Excel Online to work with the recipient on this workbook at the same time.