Skip to content
Free Excel Tutorials
  • Home
  • Excel For Beginners
  • Excel Intermediate
  • Advanced Excel For Experts

Data Analysis

  • Error Bars in Excel
  • How to create Gauge Chart in Excel
  • How to sum a total in multiple Excel tables
  • How to create a Histogram in Excel
  • How To Insert and Customize Sparklines in Excel

References

  • Extract all partial matches in Excel
  • How to calculate two-way lookup VLOOKUP in Excel Table
  • How to use Excel COLUMN Function
  • Merge tables with VLOOKUP in Excel
  • Approximate match with multiple criteria in Excel

Data Validations

  • Excel Data validation must not contain
  • Excel Data validation allow uppercase only
  • Excel Data validation must begin with
  • Excel Data validation date in next 30 days
  • Prevent invalid data entering in specific cells

Understanding Anova in Excel

by

How to Perform Analyses of Variance in Excel

This example teaches you how to perform a single factor ANOVA (analysis of variance) in Excel. A single factor or one-way ANOVA is used to test the null hypothesis that the means of several populations are all equal.

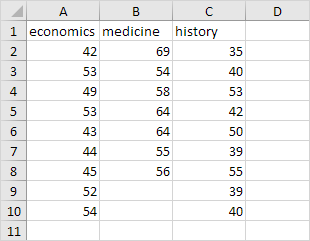
Below you can find the salaries of people who have a degree in economics, medicine or history.

H0: μ1 = μ2 = μ3
H1: at least one of the means is different.

To perform a single factor ANOVA, execute the following steps.

1. On the Data tab, in the Analysis group, Data Analysis.

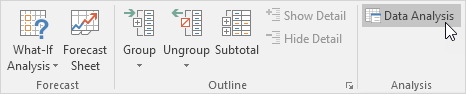
Note: can’t find the Data Analysis button? Click here to load the Analysis ToolPak add-in.

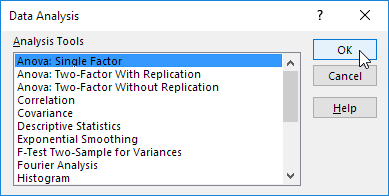
2. Select Anova: Single Factor and click OK.

3. Click in the Input Range box and select the range A2:C10.

4. Click in the Output Range box and select cell E1.

5. Click OK.

Result:

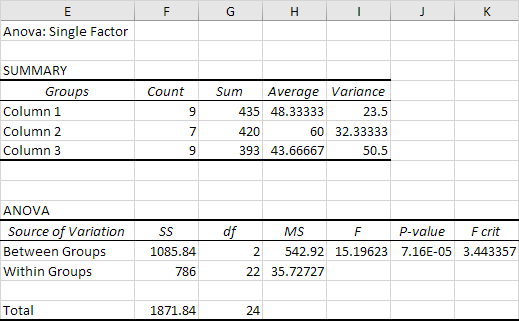
Conclusion: if F > F crit, we reject the null hypothesis. This is the case, 15.196 > 3.443. Therefore, we reject the null hypothesis. The means of the three populations are not all equal. At least one of the means is different. However, the ANOVA does not tell you where the difference lies. You need a t-Test to test each pair of means.

Post navigation

Previous Post:

TRUE function: Description, Usage, Syntax, Examples and Explanation

Next Post:

Excel Pie Chart

Leave a Reply Cancel reply

Your email address will not be published. Required fields are marked *

Learn Basic Excel

Ribbon
Workbook
Worksheets
Format Cells
Find & Select
Sort & Filter
Templates
Print
Share
Protect
Keyboard Shortcuts

Categories

  • Charts
  • Data Analysis
  • Data Validation
  • Excel Functions
    • Cube Functions
    • Database Functions
    • Date and Time Functions
    • Engineering Functions
    • Financial Functions
    • Information Functions
    • Logical Functions
    • Lookup and Reference Functions
    • Math and Trig Functions
    • Statistical Functions
    • Text Functions
    • Web Functions
  • Excel VBA
  • Excel Video Tutorials
  • Formatting
  • Grouping
  • Others

Logical Functions

  • IFERROR function: Description, Usage, Syntax, Examples and Explanation
  • How to use Excel TRUE Function
  • IF function: Description, Usage, Syntax, Examples and Explanation
  • SWITCH function example in Excel
  • Invoice status with nested if in Excel

Date Time

  • How to get same date next year or previous year in Excel
  • Custom weekday abbreviation in Excel
  • DAYS function: Description, Usage, Syntax, Examples and Explanation
  • Add years to date in Excel
  • Convert Excel time to decimal minutes

Grouping

  • How to randomly assign people to groups in Excel
  • Group numbers at uneven intervals in Excel
  • Map inputs to arbitrary values in Excel
  • Group times into unequal buckets in Excel
  • Map text to numbers in Excel

General

  • Basic text sort formula in Excel
  • How to increase by percentage in Excel
  • How to generate random date between two dates in Excel
  • Count cells less than in Excel
  • How to generate random number weighted probability in Excel
© 2026 xlsoffice . All Right Reserved. | Teal Smiles | Abbreviations And Their Meaning