Skip to content
Free Excel Tutorials
  • Home
  • Excel For Beginners
  • Excel Intermediate
  • Advanced Excel For Experts

Data Analysis

  • Example of COUNTIFS with variable table column in Excel
  • Create Scatter Chart in Excel
  • How To Compare Two Lists in Excel
  • Conditional Formatting Color Scales Examples in Excel
  • How To Filter Data in Excel

References

  • Count unique text values with criteria
  • How to use Excel ROW Function
  • VLOOKUP function: Description, Usage, Syntax, Examples and Explanation
  • Excel Advanced Lookup using Index and Match Functions
  • How to get first row number in range in Excel

Data Validations

  • Excel Data validation must contain specific text
  • Excel Data validation don’t exceed total
  • Excel Data validation require unique number
  • Excel Data validation specific characters only
  • Excel Data validation with conditional list

Dynamic Named Range in Excel

by

A dynamic named range expands automatically when you add a value to the range.

1. For example, select the range A1:A4 and name it Prices.

2. Calculate the sum.
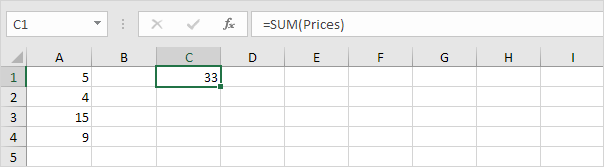
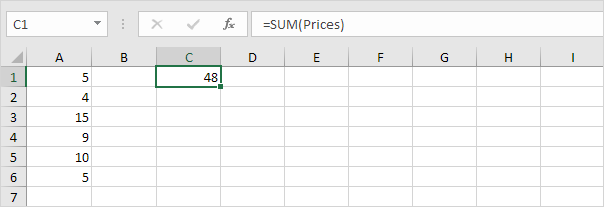
3. When you add a value to the range, Excel does not update the sum.
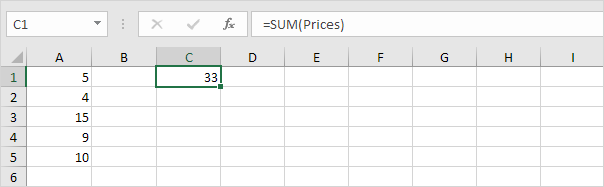
To expand the named range automatically when you add a value to the range, execute the following the following steps.

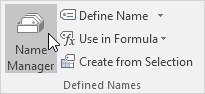
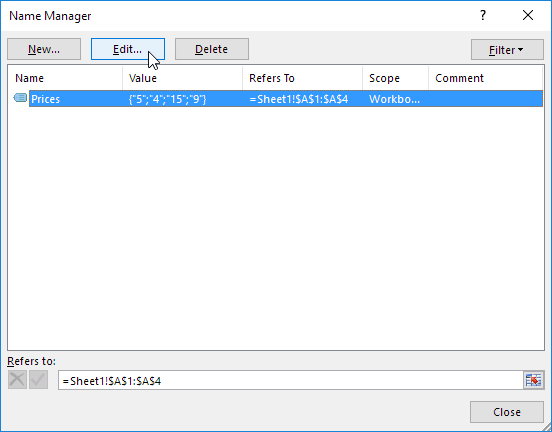
4. On the Formulas tab, in the Defined Names group, click Name Manager.
5. Click Edit.
6. Click in the “Refers to” box and enter the formula =OFFSET($A$1,0,0,COUNTA($A:$A),1)
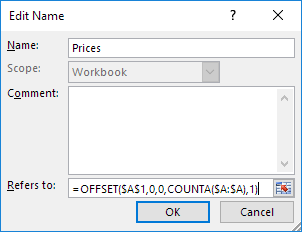
Explanation: the OFFSET function takes 5 arguments. Reference: $A$1, rows to offset: 0, columns to offset: 0, height: COUNTA($A:$A), width: 1. COUNTA($A:$A) counts the number of values in column A that are not empty. When you add a value to the range, COUNTA($A:$A) increases. As a result, the range returned by the OFFSET function expands.

7. Click OK and Close.

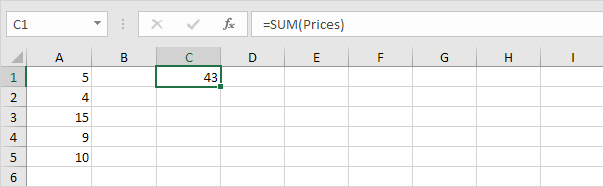
8. Now, when you add a value to the range, Excel updates the sum automatically.
 Also visit: Understanding Named Range, Named Constant, Name Manager in Excel Formulas

Post navigation

Previous Post:

TRUE function: Description, Usage, Syntax, Examples and Explanation

Next Post:

Excel Pie Chart

Leave a Reply Cancel reply

Your email address will not be published. Required fields are marked *

Learn Basic Excel

Ribbon
Workbook
Worksheets
Format Cells
Find & Select
Sort & Filter
Templates
Print
Share
Protect
Keyboard Shortcuts

Categories

  • Charts
  • Data Analysis
  • Data Validation
  • Excel Functions
    • Cube Functions
    • Database Functions
    • Date and Time Functions
    • Engineering Functions
    • Financial Functions
    • Information Functions
    • Logical Functions
    • Lookup and Reference Functions
    • Math and Trig Functions
    • Statistical Functions
    • Text Functions
    • Web Functions
  • Excel VBA
  • Excel Video Tutorials
  • Formatting
  • Grouping
  • Others

Logical Functions

  • Complete List of Excel Logical Functions, References and Examples
  • Not Equal To ‘<>‘ operator in Excel
  • Excel If, Nested If, And/Or Criteria Examples
  • How to use Excel NOT Function
  • How to return blank in place of #DIV/0! error in Excel

Date Time

  • Convert decimal hours to Excel time
  • WORKDAY function: Description, Usage, Syntax, Examples and Explanation
  • How to get Holiday Date from Year in Excel
  • Get first Monday before any date in Excel
  • Get project midpoint in Excel

Grouping

  • Map inputs to arbitrary values in Excel
  • Categorize text with keywords in Excel
  • Group numbers with VLOOKUP in Excel
  • How to randomly assign data to groups in Excel
  • Group arbitrary text values in Excel

General

  • Basic numeric sort formula in Excel
  • Subtotal invoices by age in Excel
  • How to get random value from list or table in Excel
  • Excel Operators
  • How to choose page/paper size in Excel before Printing
© 2026 xlsoffice . All Right Reserved. | Teal Smiles | Abbreviations And Their Meaning